When starting to teach, go to “Attendance” in the Course Menu. This will display all students in the Canvas space. Attendance can only be seen by teachers.
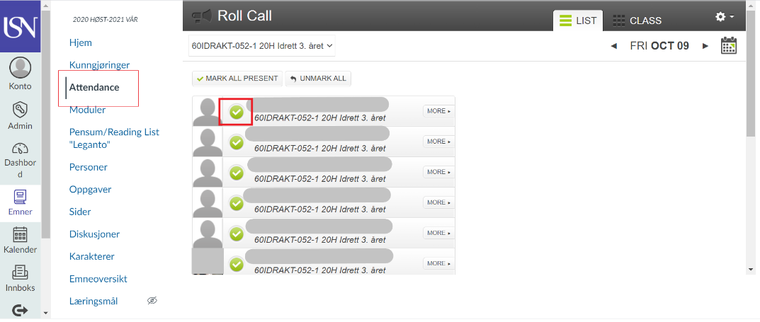
Screenshot showing registration of attendance in Canvas
- Click once to register attendance, twice to register absence. NB: Not clicking is the same as registering absence:
Lack of registration will result in an incorrect total for a student. - You can amend the registration at any time if a student arrives late and you want to register attendance.
- It is also possible to amend a registration retrospectively: Go to “Attendance” and navigate in the calendar.
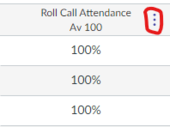
Go to “Grades” in the Course Menu to see an overview of students’ attendance percentage in the column headed “Roll Call Attendance”.
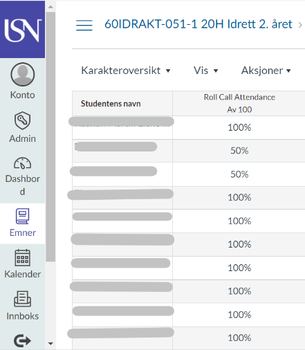
Students can also go to “Grades” in the Subject Menu (provided that the teacher has made this visible) and see their attendance percentage (Roll Call Attendance and Results).
Screenshot showing students’ attendance in Canvas
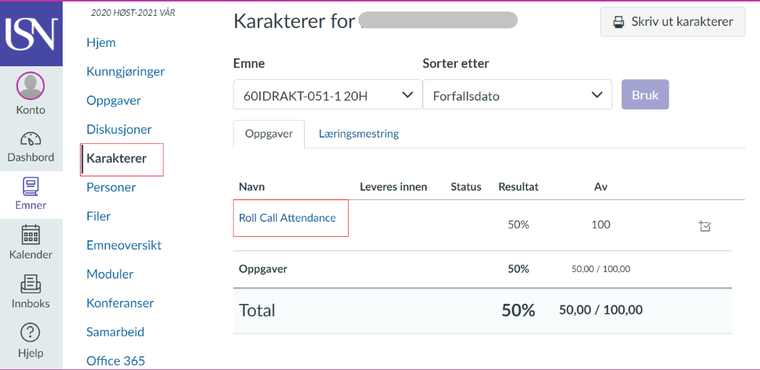
By clicking on “Roll Call Attendance”, a student can also view the number of attendances and absences.
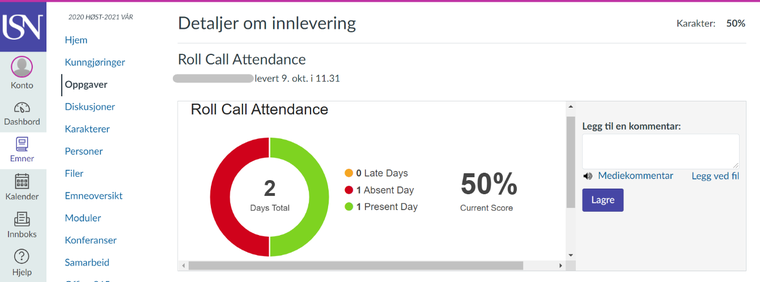
Screenshot showing the number of attendances and absences.
It is possible to send a message (in Canvas) to all students who have less than a certain percentage attendance.
Screenshot showing dot menu under “Assignment” in Grade Overview
- Go to “Grades”, click on the three dots in the heading (Roll Call Attendance) and select “Message students who”
- Select “Scored less than” and set, e.g. 80%
Everybody with lower than 80% attendance will be displayed and you can send messages directly to them.
- It is possible for a teacher to add comments to the students, since “Attendance” is technically an Assignment in Canvas. The comments will be displayed in combination for the entire assignment, not for each individual attendance, but the date of the comment will be shown. It is also possible to add the date of the teaching session if the comment is added at a later date.
- Go to “Grades”, click on the three dots in the header in Grades Overview (Roll Call Attendance) and select SpeedGrader, where you can write comments for each student.
This may, for example, be used to comment on a student’s effort in class.
- Go to “Grades”, click on the three dots in the header in Grades Overview (Roll Call Attendance) and select SpeedGrader, where you can write comments for each student.
Screenshot showing dot menu under “Assignment” in Grade Overview
- It is also possible to add various “badges” related to attendance, such as “good effort in class”, or “doctor’s note”
- Select any student in “Attendance” and click on “More”.
- Click on “+ Add Badges” and add a new one: Write name (e.g. “Good effort”), select an icon (e.g. “thumbs up”) and colour (e.g. green).
- This badge will now be displayed for each student in each class.
- When you want to assign a badge for good effort to a student, click on “More” when registering the student’s attendance in an individual class. The available badges will be displayed, and you can select the one you want to use.
- To obtain an overview of how many badges students have received during a semester, click on “More” for an individual student. This does not need to apply to a registered teaching day. On the left, under “Overviews of total attendance and absence” (Present, Late, Absent) the number of badges of each type assigned to date is displayed.
- Badges will not be visible to the students.