
Before the meeting
Download Zoom Client
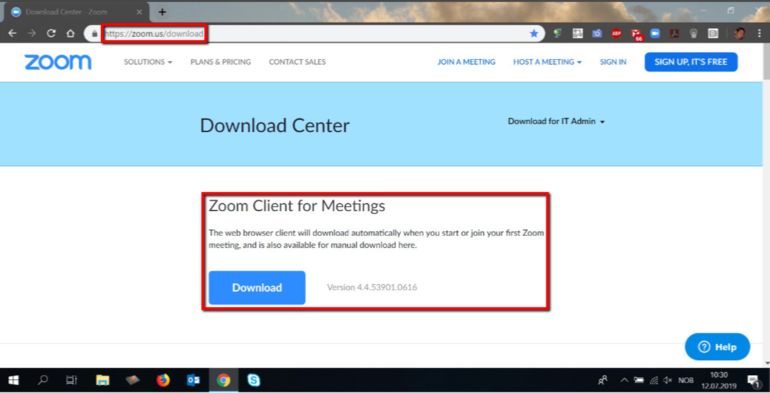
Download "Zoom Client for Meetings" directly at zoom.us/download
It should only be downloaded using this link.
After downloading you will find it in the program list:
PC:
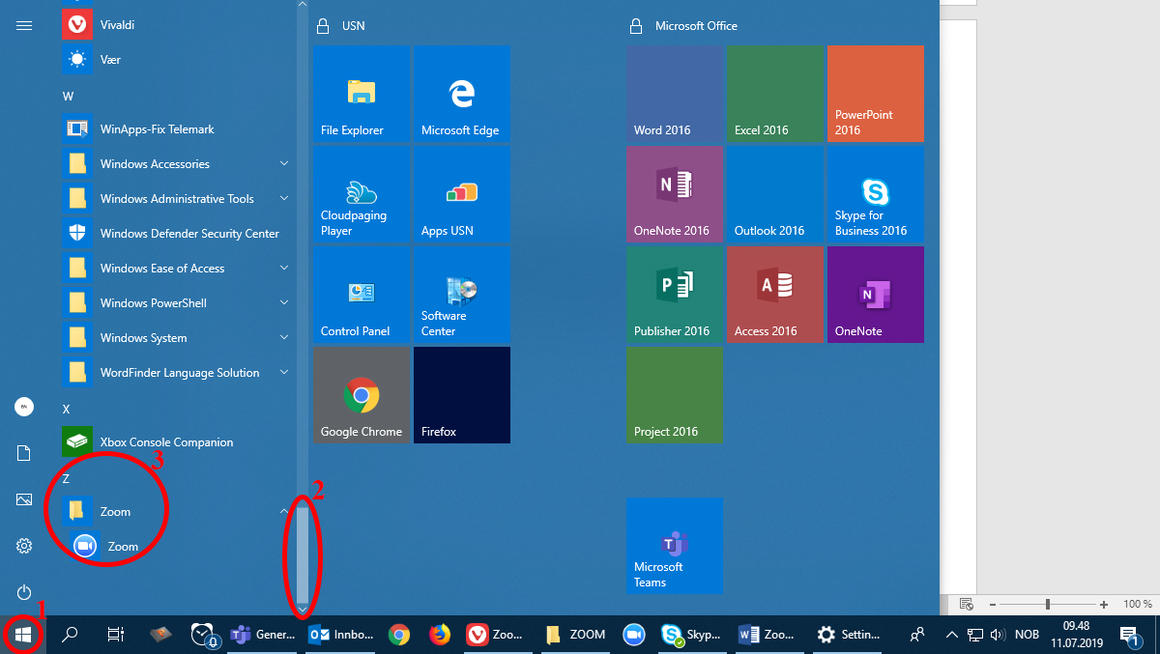
Click on the image to enlarge it
- Click on the start button.
- Programs are sorted alphabetically. Scroll down to Z.
- Click on the blue Zoom button.
Mac:
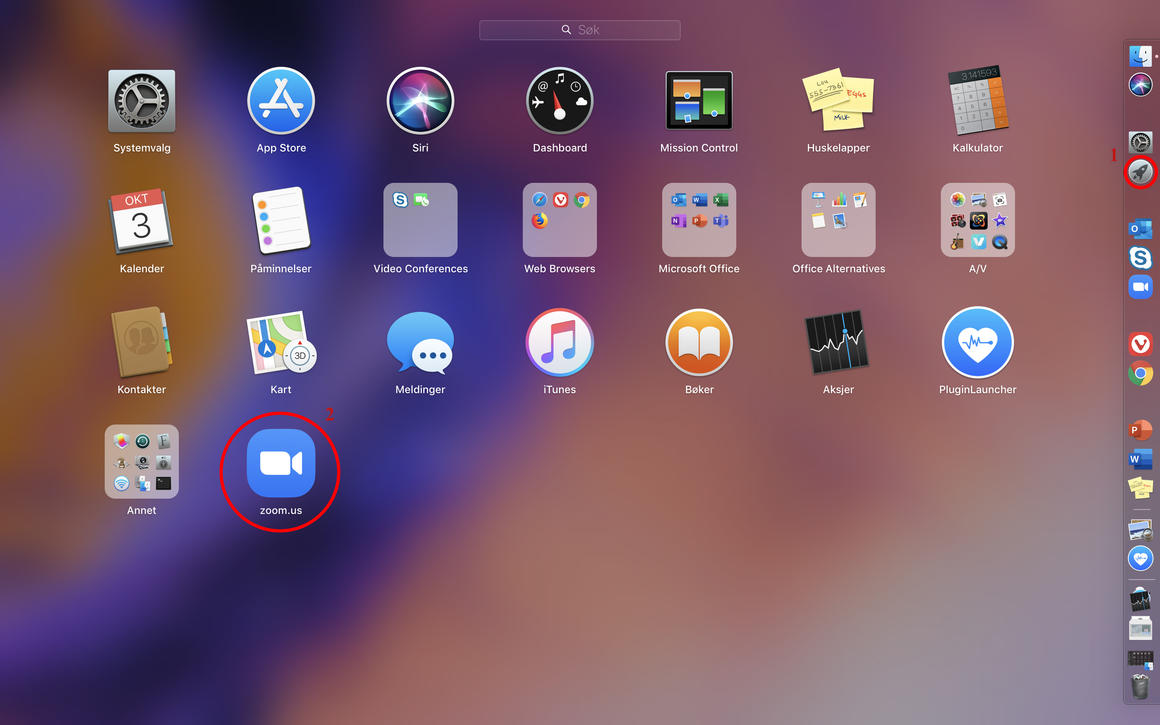
Click on the image to enlarge it
- Click on Launchpad.
- Click on the blue Zoom button.
Hint! In the Zoom Client settings you can choose to have the client start automatically when you log on to the computer. This may be practical if you often use Zoom.
Log in once to activate your USN User
Planning a Zoom meeting via Outlook
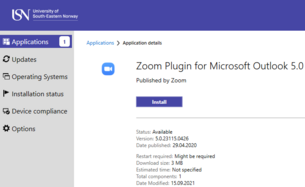
To plan a Zoom meeting directly in Microsoft Outlook, you must first download the Zoom Plugin for Microsoft Outlook.
- If Microsoft Outlook is open, you must first close the program.
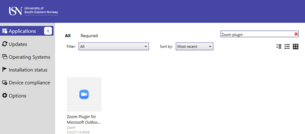
- You will find the Zoom Plugin in ‘Software Center’.
You can search for this in Windows or find it on Desktop:
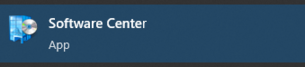
- Search for the Zoom Plugin in ‘Software Center’:
- Click on Install:
- Start Outlook.
NB: If you are not using a USN computer, you can downloadhttps://zoom.us/download
Planning a Zoom meeting using Microsoft Outlook:
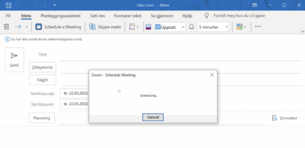
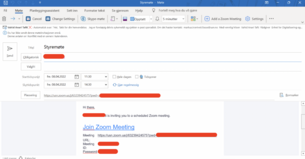
- Open the Microsoft Outlook calendar and click on ‘Schedule a Meeting’:
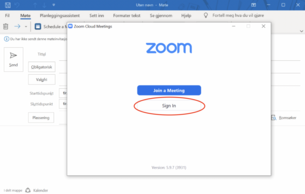
- Sign In using SSO/FEIDE.
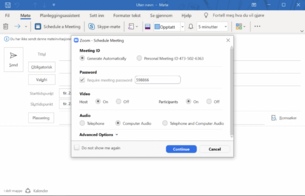
- Select the meeting settings*:
- Select Recipient(s) and send the invitation:
*Meeting settings:
- Meeting ID. It is recommended that you select ‘Generate Automatically’, not ‘Personal Meeting ID’.
- Video: You can choose whether participants join the meeting with their web cameras on or off. After the meeting starts, they are able to switch their cameras off or on.
- Audio: Always select ‘Computer Audio’.
- Advanced Options:
- Enable Waiting Room. Participants must wait in the waiting room until allowed in by the Host.
- Enable Join before Host. Participants may join the meeting before the Host arrives.
- Mute Participants upon entry. Participants join the meeting muted. They can unmute themselves.
- Only signed-in users can join the meeting. Participants must log in to Zoom to have permission to join the meeting.
- Automatically record meeting on the local computer. This function is locked in compliance with GDPR regulations.
- Force include Join URL in location field. Participants see the link as a meeting location.
- Insert Zoom meeting invitation above existing text. Participants see the standard invitation message at the top of their screens.
- Select a language for meeting invitation. Norwegian is not yet available.
- Alternative Hosts: When you choose one or more active Hosts, the first to log in to the meeting will become the Host and the second Co-Host.
Using Zoom Channel to work together (inhouse and with external parties)
A Zoom Channel gives you a permanent location in which to write messages to any member of the channel.
The text can be read later by those wishing to catch up, find shared links, etc.
You can also hold joint video meetings. This is particularly useful for researchers, work experience tutors and similar groups who have a lot of external contacts.
- Click on ‘Chat’ in your Zoom Client (you first have to log in)
- Select ‘Channels’ from the left-hand menu and click on ‘+’:
- Select ‘Create a Channel’. You can add anybody who has an e-mail address.
- You can write in shared chats or click on the camera icon (small square at the top) if you want to have a video conversation.
NB 1: You may also invite external participants to a standard Zoom meeting, but to do this you must not select ‘Only authenticated users can join: Sign in to Zoom’ when planning your meeting.
NB 2: If external users are unable to download Zoom Client because of their respective company’s/organisation's policy, they may join a meeting via Zoom web client: https://support.zoom.us/hc/en-us/articles/214629443-Zoom-Web-Client
During the meeting
Using toolbar in meeting as Host
This content is currently under construction...
Using toolbar in meeting as Participant

A participant has access to the following functions:
- Mute / Unmute: Switch the microphone off and on.
- Volume control (click on the ^ arrow beside the Mute / Unmute icon) allows you to adjust the microphone and speaker Zoom
Hint: Use the following keyboard shortcut for Mute / Unmute.
- Windows: Alt + A
- Mac: Shift + Command + A
- Start / Stop Video: Switches the camera on or off.
- Video control (click on the ^ arrow beside the Start / Stop Video icon): Switch cameras if you have more than one, select a virtual background or USN logo, or access the full range of video settings.
- Video control (click on the ^ arrow beside the Start / Stop Video icon): Switch cameras if you have more than one, select a virtual background or USN logo, or access the full range of video settings.
- Participants: See who is participating in the meeting
Read more about the list of participants.
- Chat: Open the chat window to talk with participants
Read more about chat in Zoom.
- Share Screen: Start screen sharing
Read more about screen sharing here.
- Record: Host must give you permission to record
Read more about record in Zoom here
- Reactions: Give feedback by using reactions in Zoom.
If you don't have the same options as others in the meeting have, e.g. To raise your hand, you need to update your Zoom client to a newer version.
- Leave Meeting: Leave the meeting while it continues for the other participants.
If required
Roller og Rettigheter (text in norwegian)
Ta opptak av undervisningen (text in norwegian)
Bruke Breakout Rooms (text in norwegian)