Online teaching shall always be planned directly using Canvas. This enables both the teacher and the students to easily find the correct link to the Zoom teaching session via the "Zoom" menu option in Canvas.
Read more about how to plan teaching sessions in Canvas.
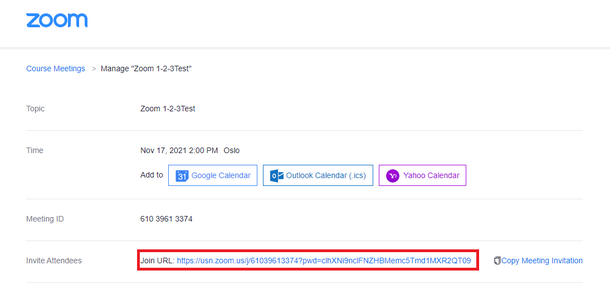
When you have created a Zoom meeting (online teaching session) in Canvas, you will find the meeting link as follows:
- Click on "Zoom" in the Course Menu, followed by "Upcoming Meetings".
- Click on the Topic of this meeting.
- The link is displayed before "Invite Attendees".
If you have created the meeting in Outlook, you will find the Meeting URL in the planned meeting in the Outlook calendar entry.
You will also find your planned Zoom meetings by way of your Zoom profile. Log in at https://usn.zoom.us and click on "Meetings". Click on the meeting in question to find the link (Invite Link).
Click on the "Schedule" option on the Zoom Client home page .
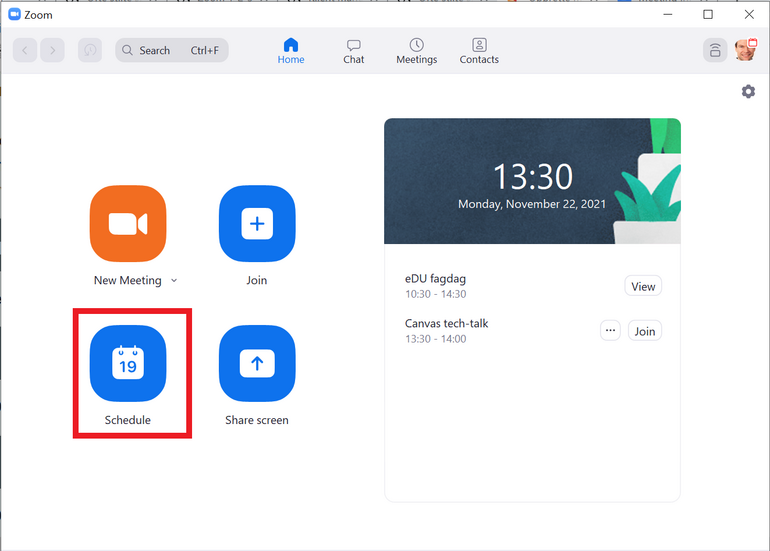
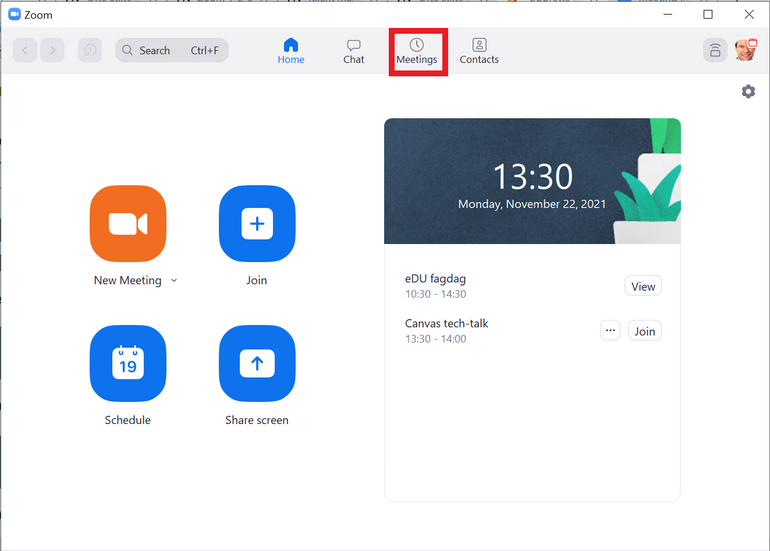
and set the meeting options. Find the meeting in question under "Meetings" and click on "Show Meeting Invitation" to display the link for inviting new participants.
Log in at https://usn.zoom.us and click on "Meetings".
Click on "Schedule a Meeting" to plan a new meeting. 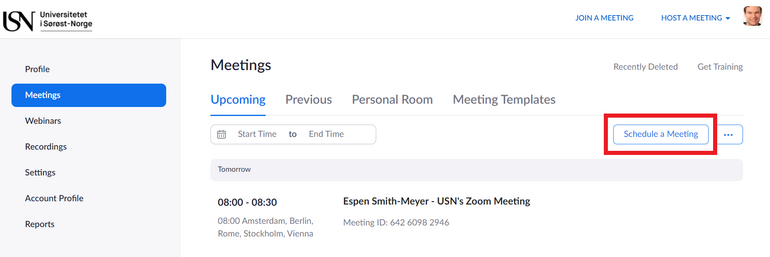

Click on the meeting in question when it has been created to find the link (Invite Link) that you can use to invite participants.
To plan a Zoom meeting directly in Microsoft Outlook you must download the Zoom Plugin for Microsoft Outlook.
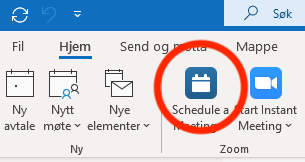
After downloading the plugin you must restart Microsoft Outlook. A new Zoom meeting icon will now be visible in your calendar.
Simply click on this to plan a meeting.
- Meeting ID: It is recommended to choose "Generate Automatically", NOT Personal Meeting ID
- Video: You may choose whether participants are to enter the meeting with their web cameras on or off. After the meeting starts they are able to switch their cameras off or on.
- Audio: Always select "Computer Audio".
- Advanced Options:
- Enable Waiting Room: Participants must wait in the waiting room until allowed in by the Host.
- Enable join before host: Participants may enter the meeting before the Host arrives.
- Mute Participants upon entry: Participants enter the meeting muted. They can unmute themselves.
- Only signed-in users can join the meeting: Participants must log in to Zoom to have permission to participate in the meeting.
- Automatically record meeting on the local computer: This function is blocked in accordance with GDPR rules.
- Force include Join URL in location field: Participants see the link as a meeting location
- Insert Zoom meeting invitation above existing text: Participants see the standard invitation message at the top of their screens.
- Select a language for meeting invitation: Norwegian is not yet available.
- Alternative hosts: When you choose one or more alternative Hosts, the first to log in to the meeting will become the Host and the second Co-host.
- It is possible for each Zoom-user to schedule up to two meetings at once.
- You should chose Alternativ Host for at least one of the meetings
- It is not possible to schedule more than one Zoom-webinar at the time.
In principle you may invite whoever you wish to a Zoom meeting.
When you have created a meeting, you can find the meeting link (see questions and answers above) and distribute it to people you wish to invite, e.g. by e-mail.
We recommend that you distribute links carefully, so that outsiders cannot get access to a link and enter a meeting.
Links should, for example, not be distributed on an open network unless there are good reasons for doing so.
- Zoom Webinar and Zoom Meetings are two different tools, with some small differences in features.
- Zoom Webinar can also be run through Zoom Meetings, so you don't have to download a new program to host a webinar in Zoom.
- The main reason for using Zoom Webinar is the bumber of participants: With the webinar license, you can have up to 1000 participants. USN has 35 webinar licences that are given as needed. Contact Vahid Anari Tafti if you are in need of a Webinar-license.
- NB! All USN users are licensed for up to 300 participants in their Zoom meetings. If you are planning a meeting for up to 500 participants, you can get a separate license for large meetings, which is something other than a webinar. Contact Vahid Anari Tafti.
It is possible to grant and receive so-called "scheduling privilege" in Zoom.
- You may appoint or delegate one or more users to plan meetings on your behalf.
- You may also plan meetings on behalf of one or more users who have granted you scheduling privilege.
- You and the assigned scheduler must be logged in using USN FEIDE login credentials.
- Users whose accounts include scheduling privilege will be able to administrate and function as an alternative Host in all meetings.
To assign scheduling privilege:
- Log in to your Zoom profile.
- Click on "Settings".
- Under "Other", click on the + sign beside "Assign Scheduling Privilege to". .
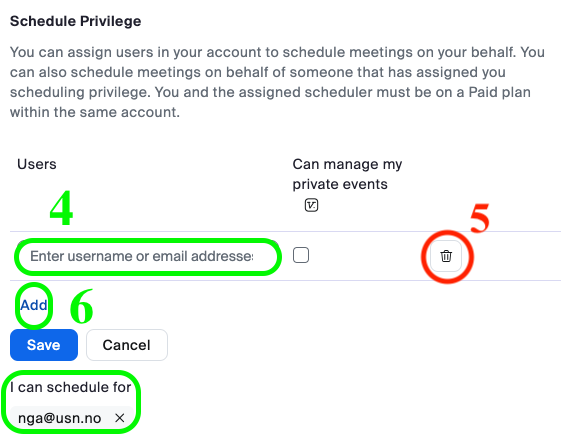
- Type in one or more e-mail addresses in the window, separated by commas. Click on "Assign".
If assignment to a user is successful, this will be displayed under "Assign Scheduling Privilege to". They must log out of Zoom Client and log in again before they can plan on your behalf.
If scheduling privilege cannot be assigned because the user does not have a USN account, you will receive an error message.
Scheduling on behalf of another user:
- In Zoom client:
- Log out of Zoom Client and log in again.
- Click on the "Schedule" icon.
This opens to scheduler window. - Click on "Advanced Options".
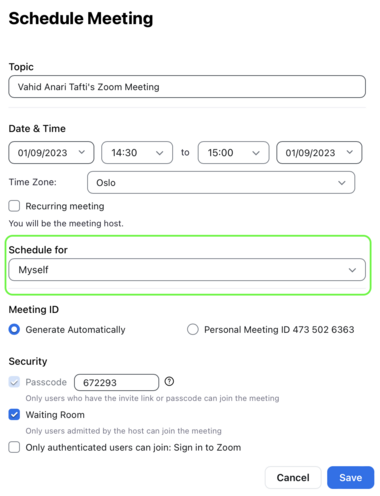
- Tick "Schedule For".
- Velg brukeren du vil planlegge for fra rullegardinmenyen
- Click on "Schedule" to complete the assignment.
- In your Zoom profile:
- Log out of Zoom Client and log in again.
- Click on "Meetings", and then on "Schedule A Meeting".

- Click on "Advanced Options".
- Select the user on whose behalf you want to schedule from the drop-down menu.
- Click on "Save" to complete the appointment.